Using a Windows ARM VM on a ARM MAC
While working on some obscure Windows and .NET things involving the requirement to run on Windows, I had to install a Windows VM.
So I started looking around what can be done nowadays to use a VM in macOS. My first thought was to use Virtualbox and I rejoice when I found a developer preview of it was available. After some poking around, I found out that even if it's working on ARM, it is not capable of running ARM VMs.
So I started looking elsewhere and I found UTM, a free and open source VM manager for macOS.
In this article, I will explain how you can install Windows ARM on an ARM Mac using UTM.
Prerequisites
First of all, you will need to retrieve the Windows ARM image. Fortunately, Microsoft provides a free evaluation version. To be able to download it, you can simply register to the Windows Insider program (a Microsoft account is required).
Then you need to install UTM, just follow the instructions on their website.
Configuring the VM
Unfortunately, just booting the VM on the provided HDVX file in UTM is not enough with Windows 11 (hence this blog). So here are the steps to install the VM correctly:
-
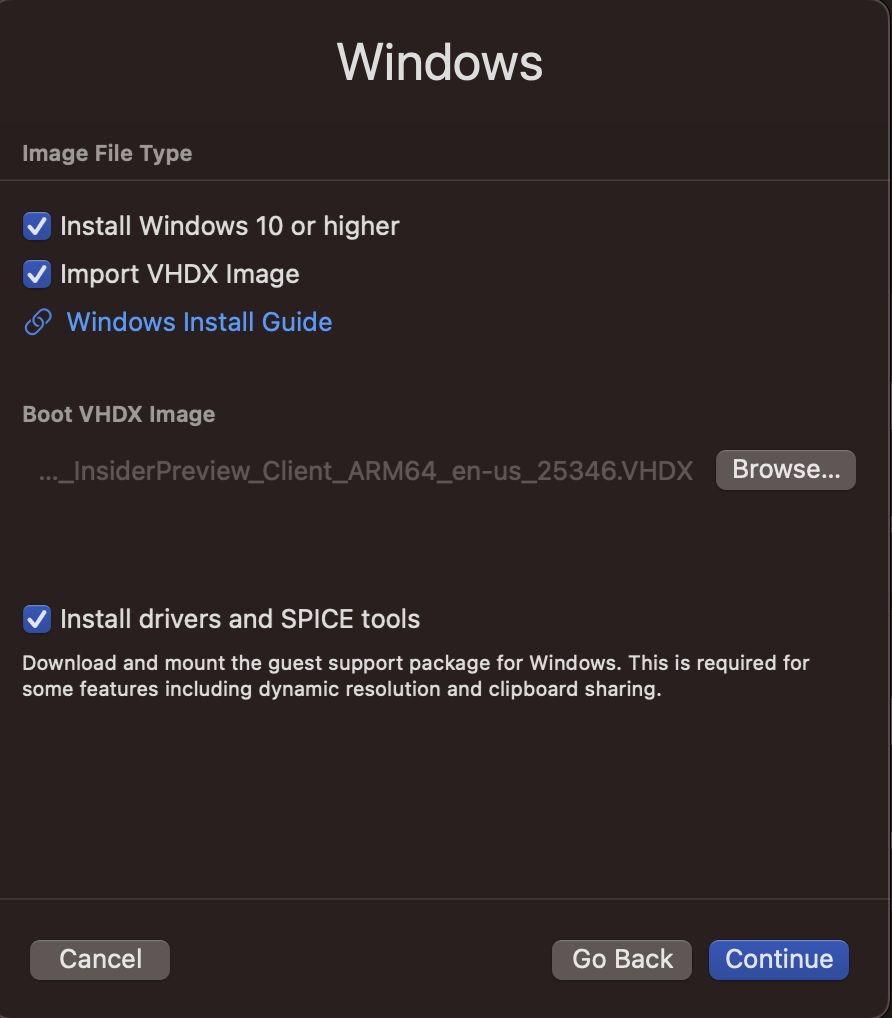
Create a new VM in UTM, you can select virtualization as we are using the same CPU architecture. Then you can use the HDVX file you downloaded from Microsoft:
-
After the boot, you will be prompted to select a network to finish the installation. But, the network will not be detected. So you need to press MAJ + F10 to open a command prompt and run the following command
OOBE\BYPASSNRO.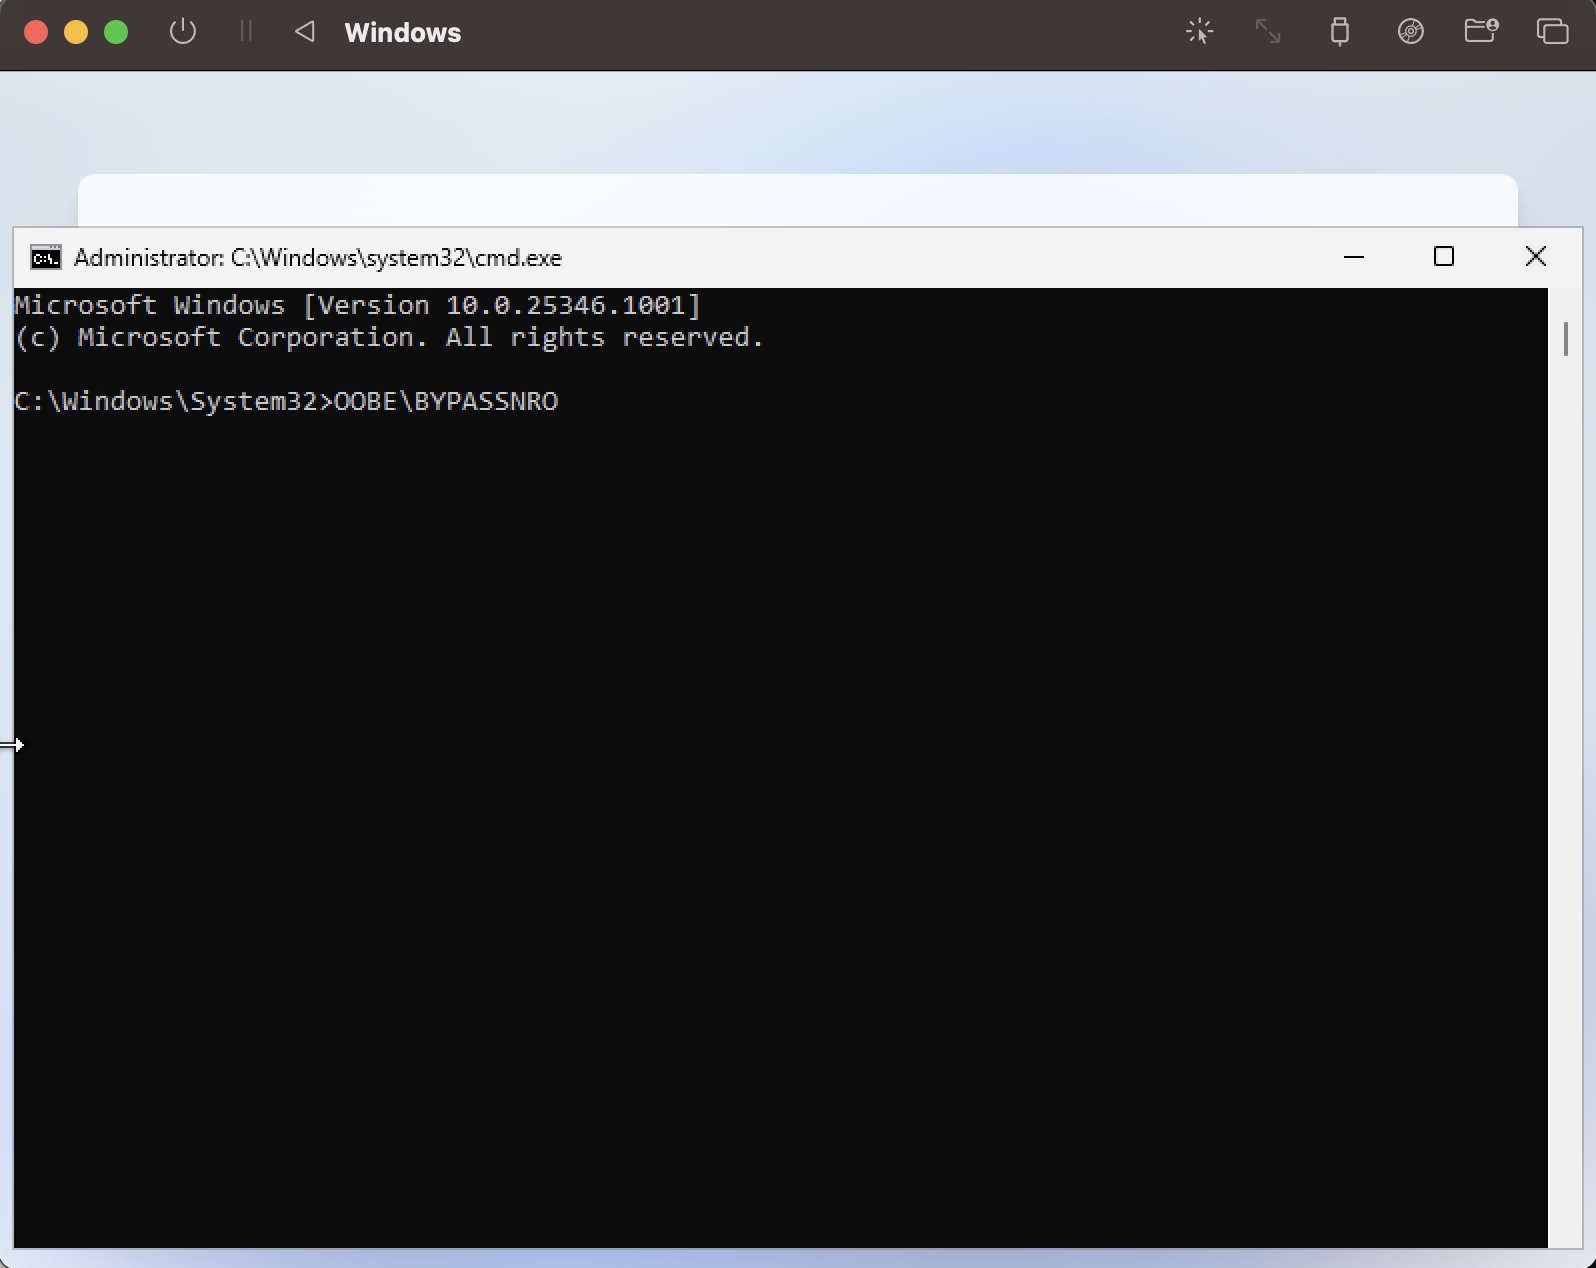
-
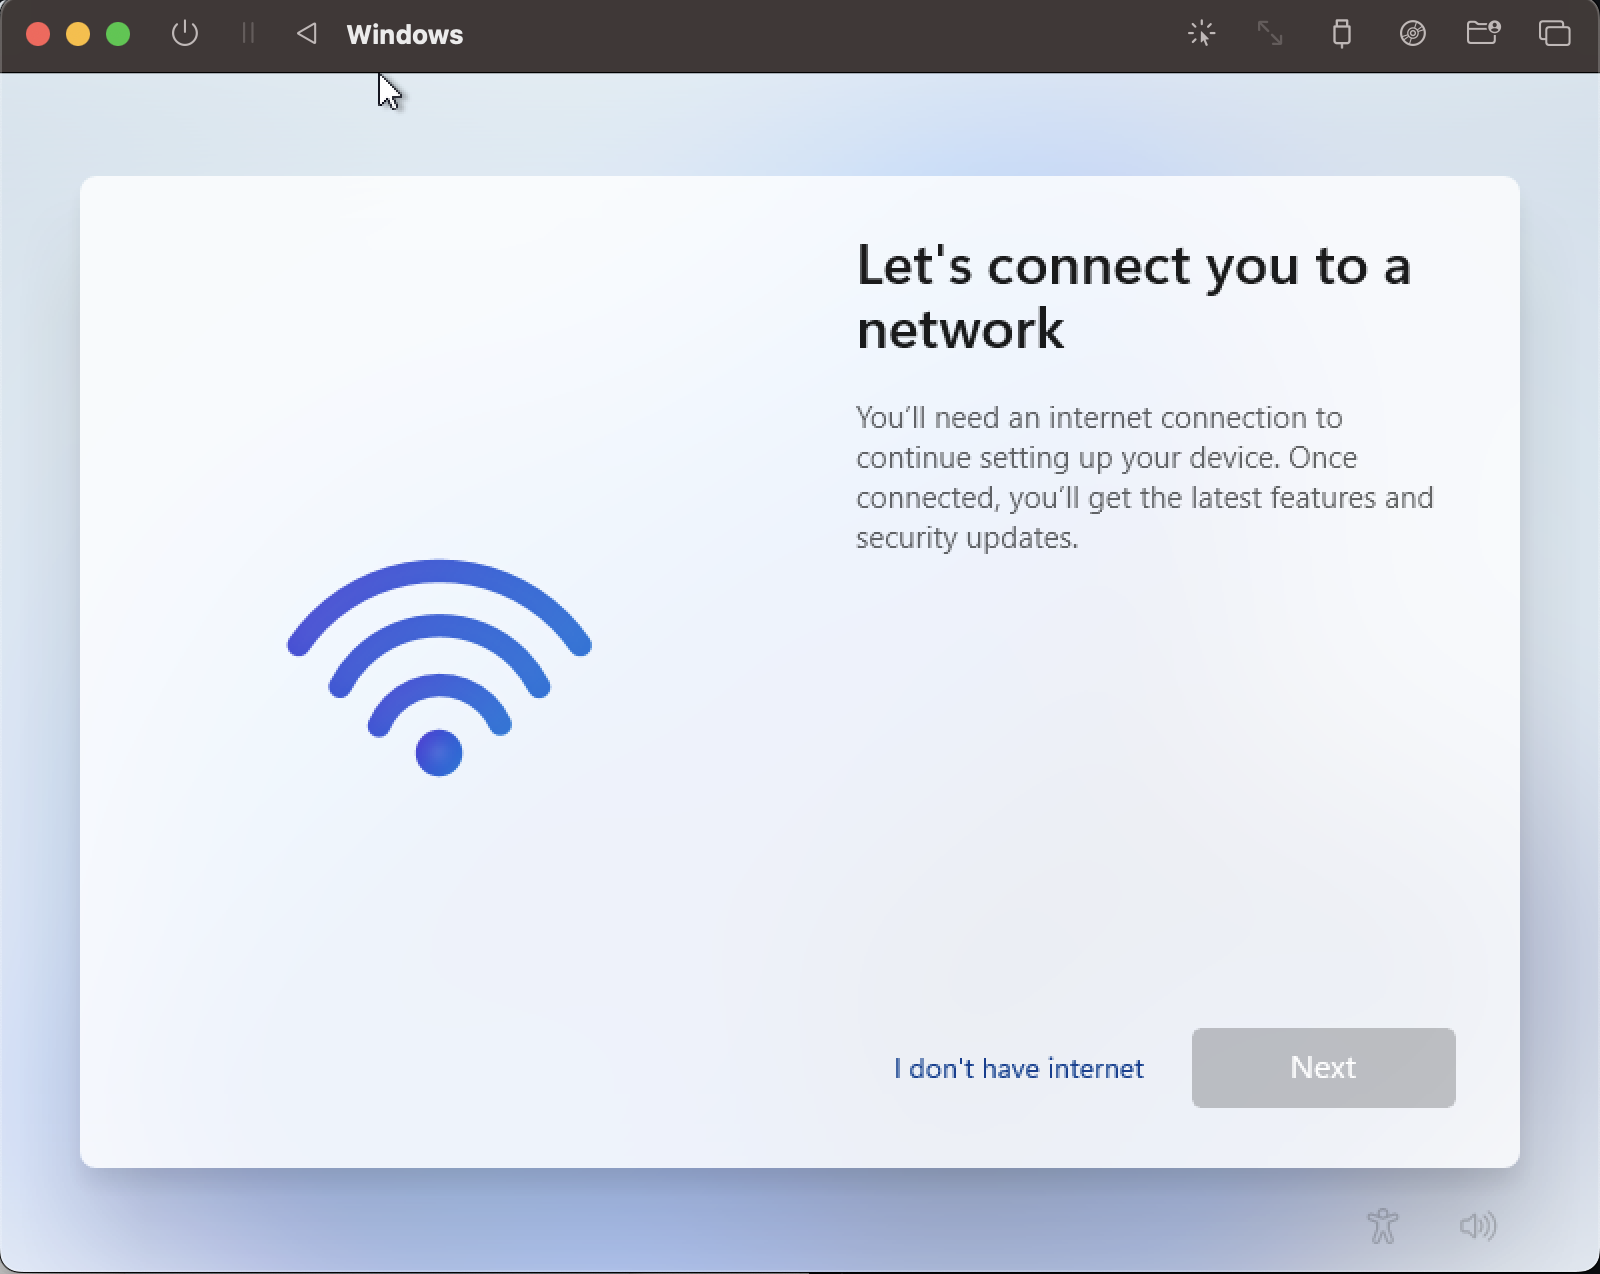
This will reboot the VM, and when you get back to the network page, you will now have a “I don’t have internet” button 😎
-
Then you can finish the installation normally, and you will be greeted by the Windows 11 desktop. Where you won't have internet and an horrible resolution 😭
-
But don't worry, UTM got you covered, as you checked the "Install drivers and SPICE tools" box on the VM configuration, A Disk is mounted on the VM, you can run the "SPICE guest tools" installer that will reboot the VM.
-
The final step will be to modify the network configuration in UTM. You need to go to the VM configuration, then to the network tab. There you will need to change the network adapter type to "virtio-net-pci" and the network mode to "Bridged". The interface that you need to use can probably stay the default value, but in doubt you can run
route get 10.10.10.10and check what's the used interface.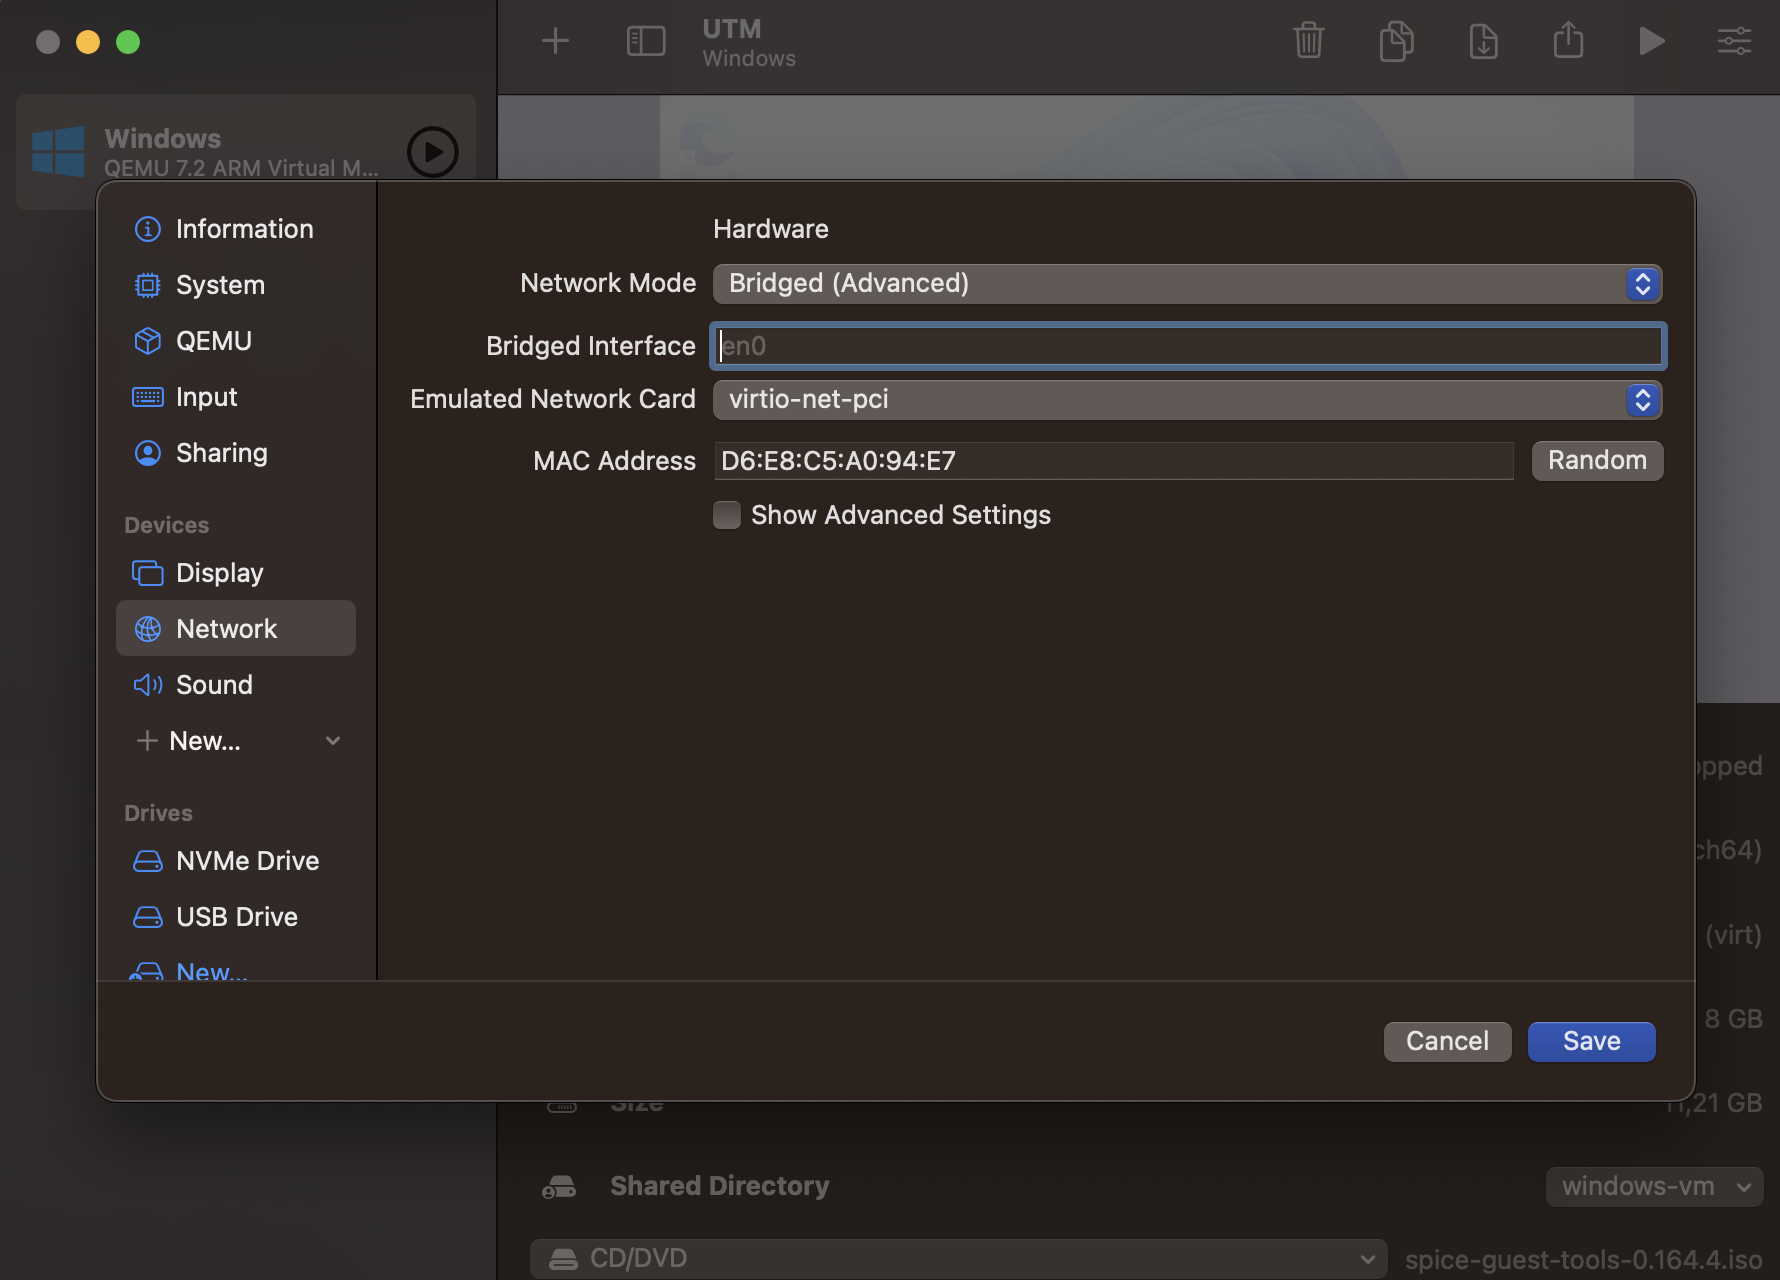
Final words
And that's it, you now have a working Windows ARM VM on your Mac ARM 🎉 You can tweak a bit the resources you want to allocate to the VM to ensure correct performances, but it's working pretty well for me at the time of this writing.
What's cool also is that UTM is not limited to Windows ARM, you can use it to run any VMs, and also it's free and open source. You can find the code and issue tracker on GitHub.
Hope It can help someone.
Flo.